I know how hard it can be to start a new habit—that is why I created this +20 page PDF as an introduction to food dehydration.
DOWNLOAD it below or read the whole text on this page!
Table of Contents
I am happy you are curious about dehydrating food!
This text is intended as a simple introduction, not as a complete guide on the subject. I created it in a short and condensed way to inspire you and provide you with the essential information to get started.
For optimal learning, do the short exercises described in the text and test all the techniques. It’s about testing a small amount of food at a time and then increasing it. It’s simply wiser to try small batches of different food in the beginning, as not all food should be pre-treated and dehydrated in the same way (the opposite would be to dehydrate large quantities of only one ingredient!).
Now, have a lot of fun!
Best wishes, Eric Tornblad
PS. This is the first version of the text, and some errors may have sneaked in, so please feel free to email me if you find any – hello@dehydratefood.info
DEHYDRATE FOR THE FIRST TIME
It is clever to start with simple food and a simple drying method the first time. Air drying at room temperature is the easiest; it just takes some time.
Try drying one or more of these ingredients!
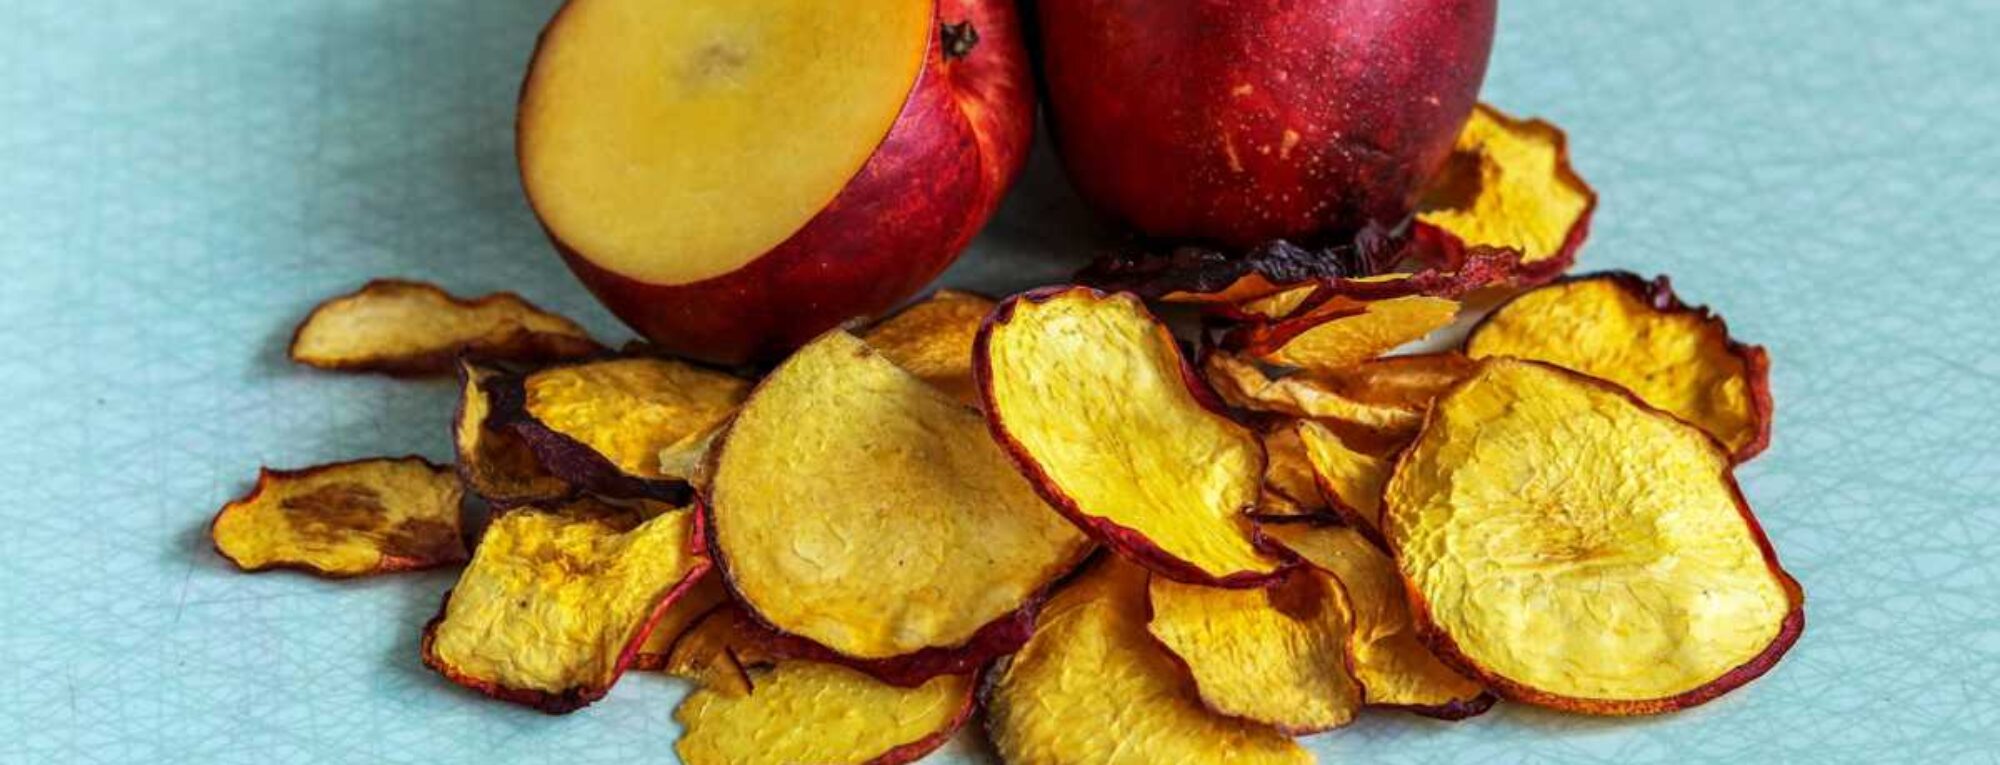
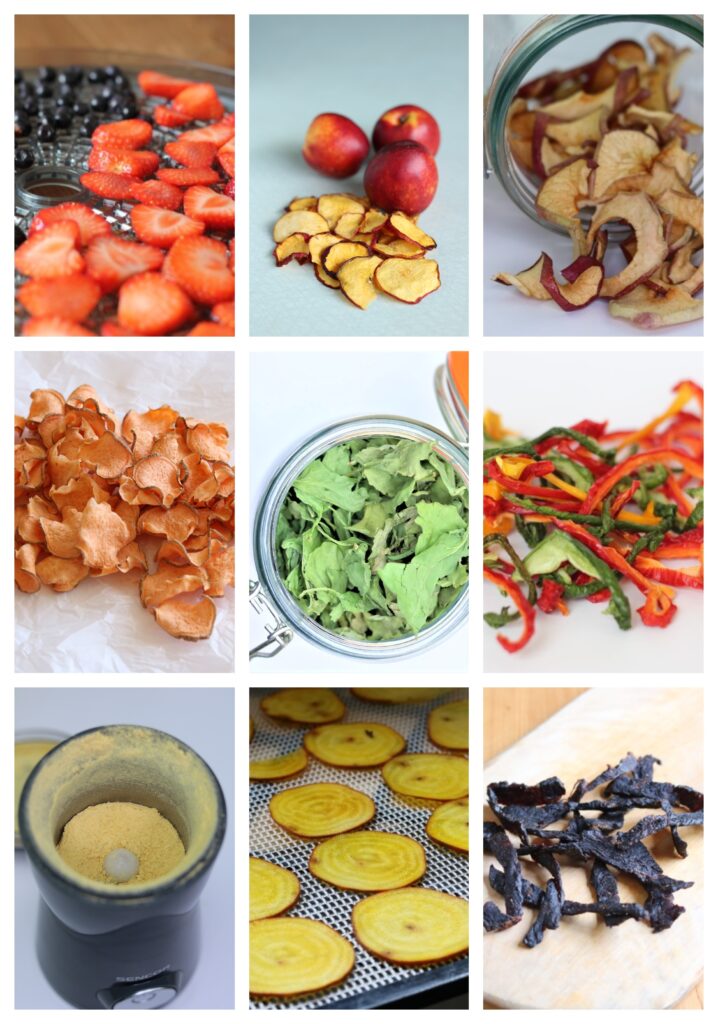
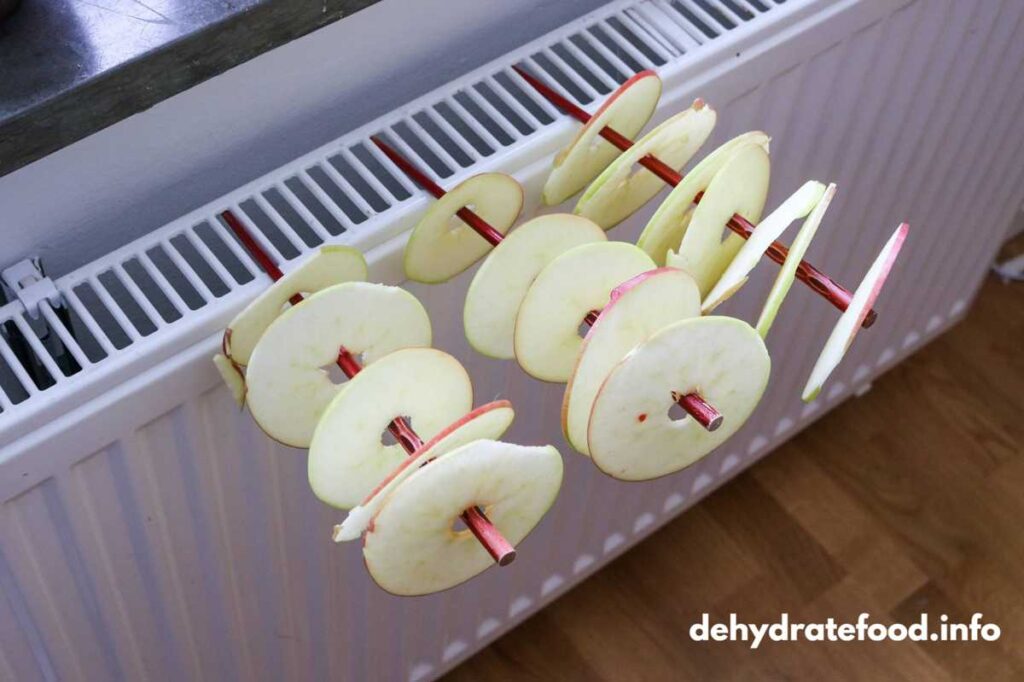
| APPLE | Core with a corer or a smaller knife. Cut slices 2–3 mm thin. Hang on a stick or thread. |
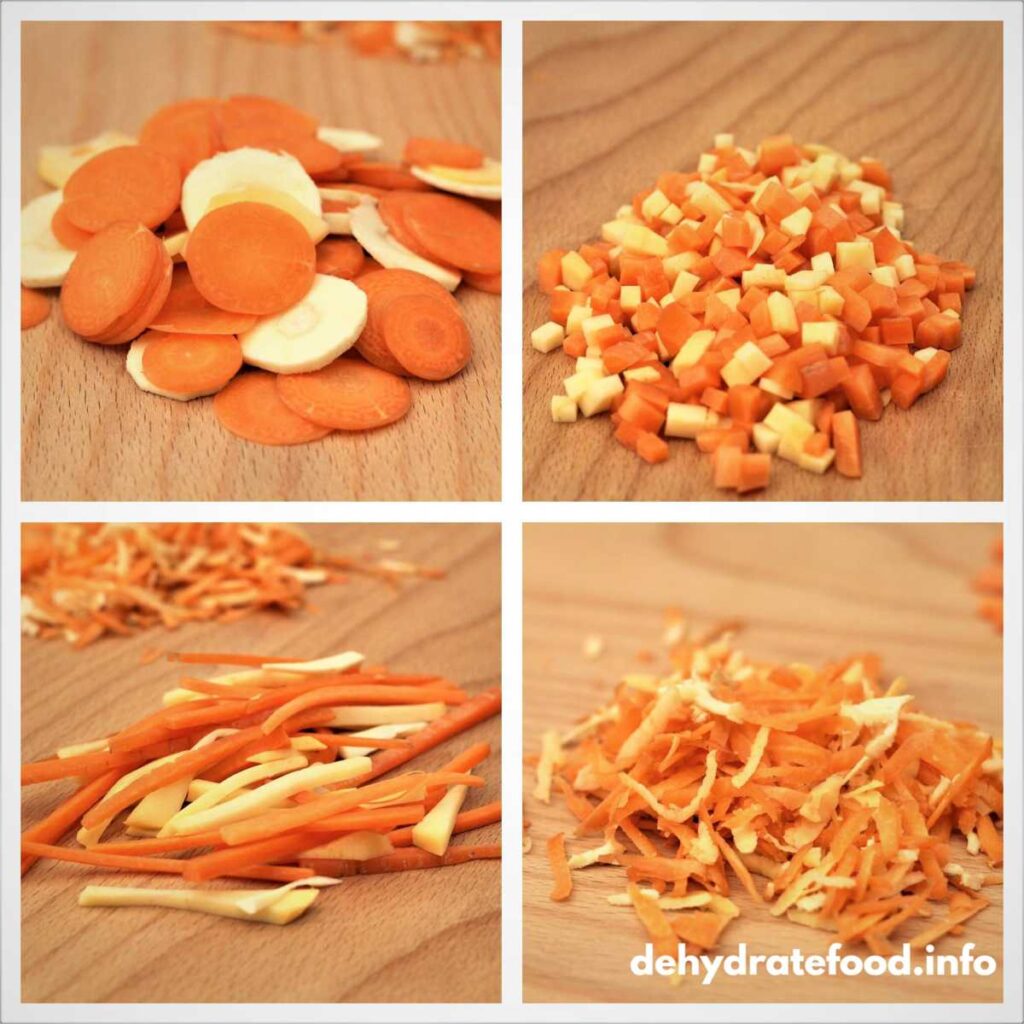
| CARROT | Peel a carrot, then cut/peel thin strips. Hang them on a thread or put them on a mesh. |
| LEEK | Cut 2 mm slices and place them on a thin cloth, for example, a kitchen towel. |
| HERBS | Cut small bouquets of parsley or other herbs, hang them on a wire, a stick or put them on thin fabric/a mesh. |
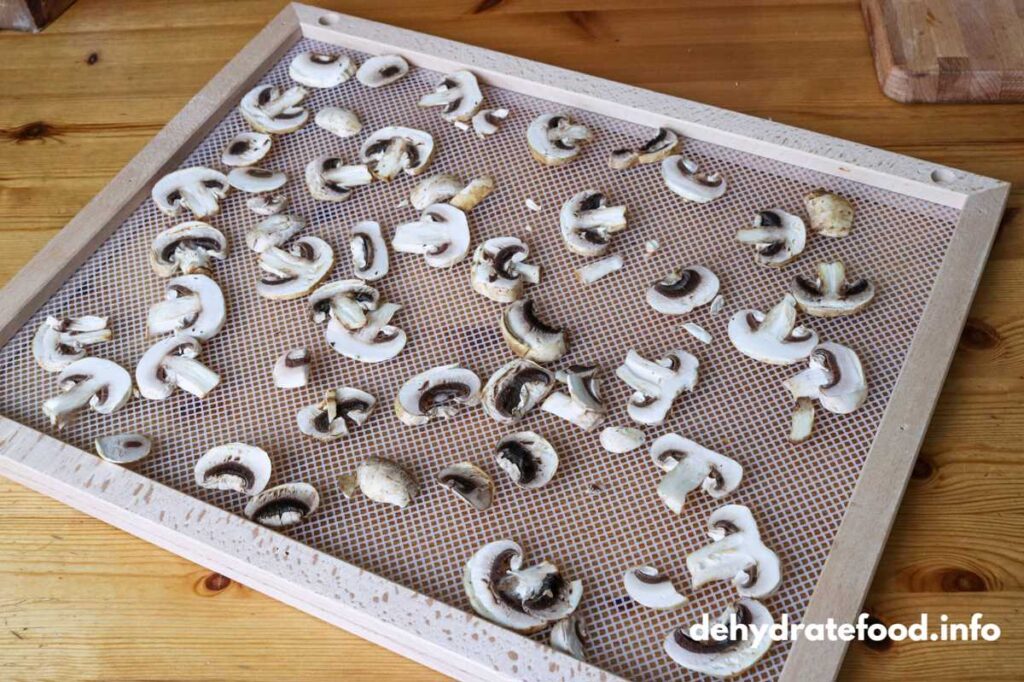
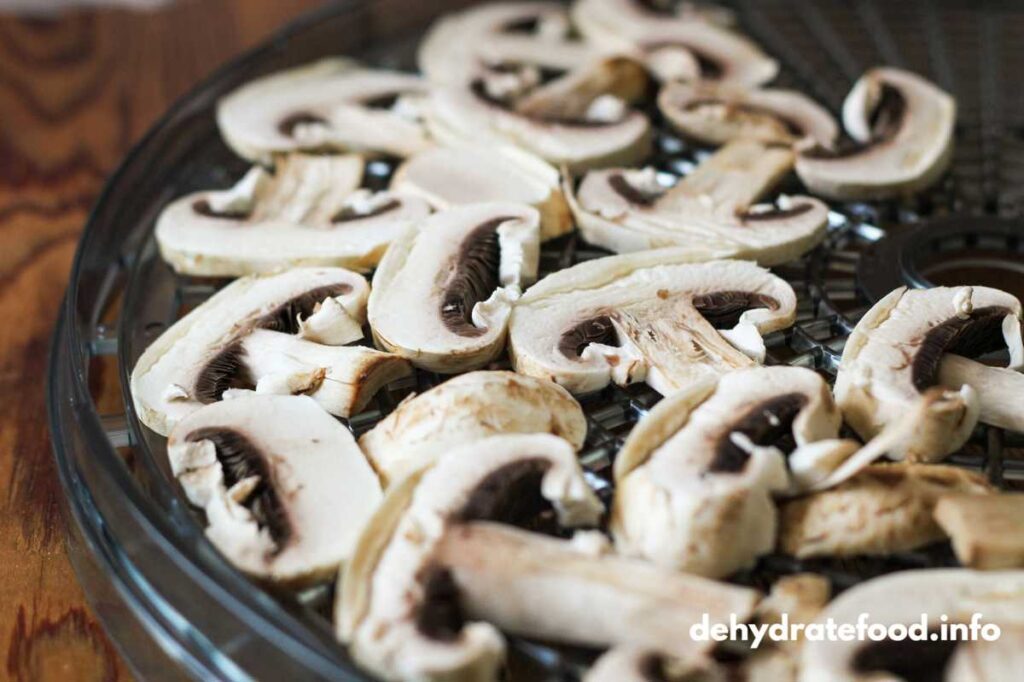
| MUSHROOMS | Cut into 3 mm slices and place them airy on a mesh. |
THE FIVE STEPS OF DRYING FOOD
| 1. CHOOSE FOOD | – High quality, not too ripe. |
| 2. PREPARE | – For example, cut in cubes and parboil. |
| 3. DEHYDRATE | – Air-dry, or in an oven or a food dehydrator. |
| 4. STORE | – Glass jars for more extended storage. |
| 5. COOK/ EAT | – Soak and cook; dried fruit can be eaten as it is. |
PRE-TREATMENTS
| CUT | You usually have to cut food into smaller pieces before dehydration. |
| FRY | Meat and other animal products should be heated before dehydration. |
| PARBOIL | To boil for a short time in lightly salted water. Many vegetables benefit from being blanched or parboiled. Potatoes must be parboiled to avoid turning grey. |
| STEAM | An alternative to parboiling. |
5 DIFFERENT DRYING METHODS
Read more about drying methods
| FOOD DEHYDRATOR | There are two types of food dehydrators: round ones, where the air flows from below and upwards and square ones, where the air flows from the side. The square ones can dry stews and pureé. Further along in the PDF, you can read about choosing a food dehydrator. |
| OVEN/CONVECTOR OVEN | An oven works well for food with less water, such as meat. It is possible to dry vegetables, but it takes a long time. Although, an oven is excellent for pre-cooking/roasting all kinds of food before drying. |
| AIR DRYING – STICK | Drill holes in a wooden plank, insert wooden chopsticks and hang apple rings or herb bouquets. |
| AIR DRYING – NET | Use an old window frame, or assemble a simple wood frame. Then, stretch a mosquito net, which you fasten with a stapler. Use to dry apples, onions and mushrooms. |
| AIR DRYING – WIRE | Stretch a wire between two nails in the kitchen where you can hang apple rings or herbs. |
DEHYDRATE IN AN OVEN
Your regular oven at home works well for food that doesn’t contain much water, for example, meat and chicken. The oven is also excellent for cooking meat and also for cooking vegetables before drying them, 100°C/212°F or higher. When drying in an oven, the food should be thinly sliced to reduce drying times.
DEHYDRATE IN A CONVECTION OVEN
There are two types of convection ovens – those that can run with the door open and those that shut off. My oven at home can’t run with the door open; I have to open the door from time to time and let moisture out. Using a convection oven, you can dry several plates simultaneously, but it takes a longer time. If you use a convection oven, you will get significantly shorter drying times than using an oven without convection.
DRY IN OVEN WITHOUT CONVECTION
Ovens without hot air can always be left open. The classic method is to put a wooden spoon in the opening. You should only use one baking sheet at a time in an oven without convection.

FOOD DEHYDRATOR
Read more: How to choose food dehydrator
Drying food with an ordinary oven is possible. But it takes longer. With a food dehydrator, the air circulation is much higher, which results in faster drying and a higher quality of the food.
Another benefit is lower energy consumption compared to a conventional oven. The reduced energy consumption comes from the shorter drying time, and the dehydrator has a more accurate thermostat.
After a while, you know exactly how long it takes to dry a food of a certain thickness and at a specific temperature. A food dehydrator is perfect for water-rich food such as vegetables. However, meat can be dried almost as well in a convection oven as in a food dehydrator because it contains a small amount of water after frying.
Since it is an investment and remains unused, some or most of the time, an idea is to share a food dehydrator with a friend.
HYGIENE
In my fifteen years of drying food, I have never heard of anyone becoming ill from dehydrated food. But of course, you should always keep good hygiene when handling food.
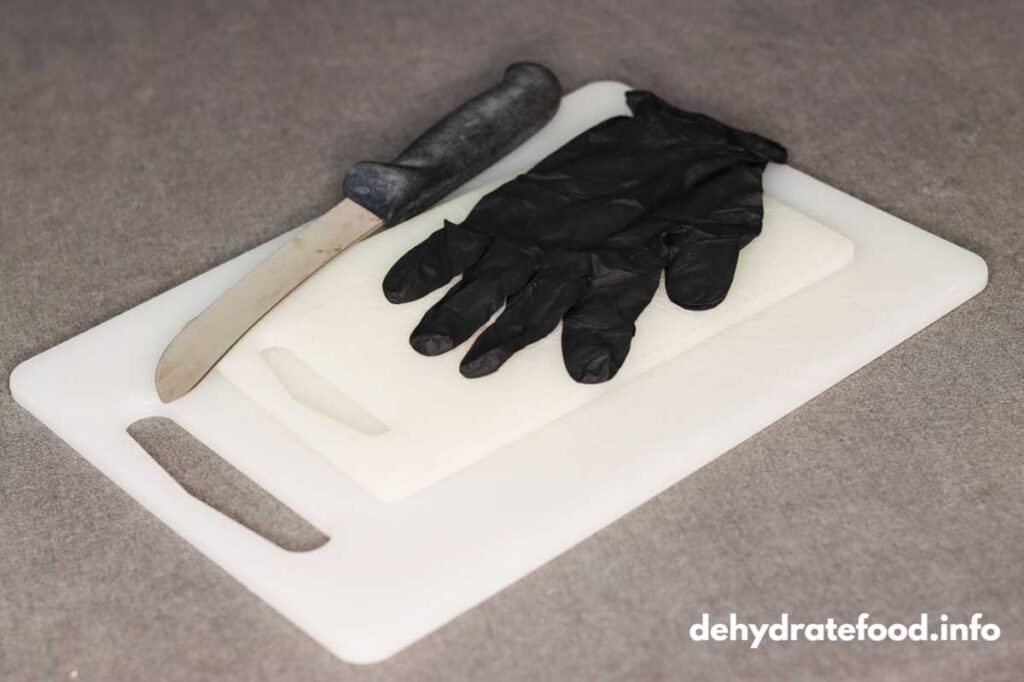
Use plastic gloves when handling meat or other more sensitive ingredients. Don’t eat dried food that tastes or smells strange. If it tastes and smells well, but you are still unsure, cook the food properly.
Think about your hands, kitchen towels (often missed), knives, utensils, bowls, cutting boards – and other things that come into contact with the food.
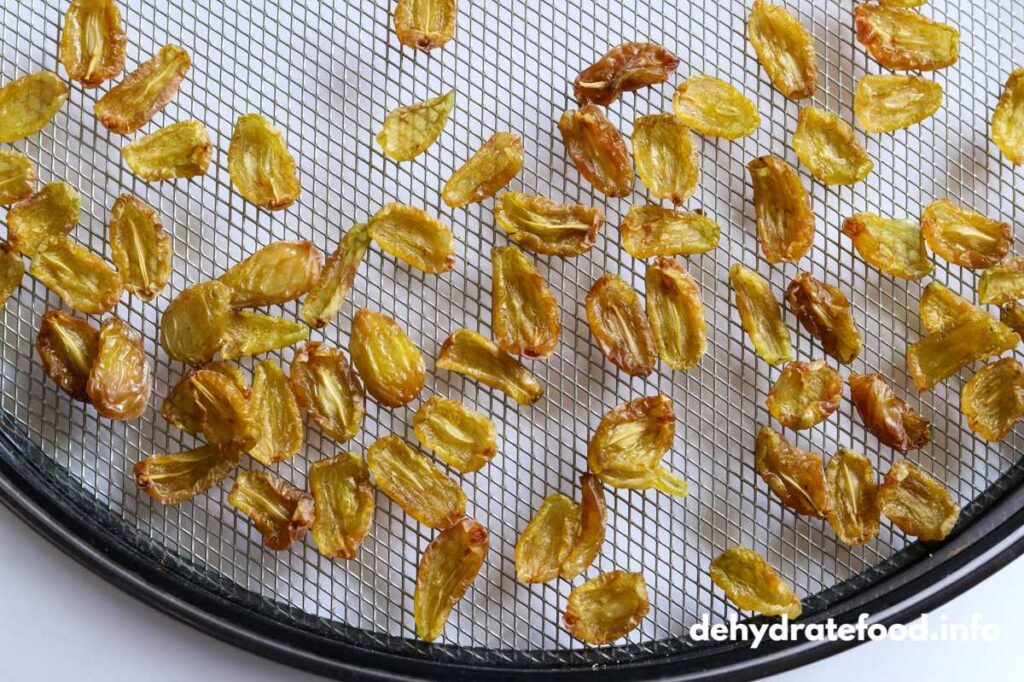
WHEN IS THE FOOD DRY?
| FRUIT & BERRIES | Tough or brittle, depending on the sugar content. |
| VEGETABLES | Brittle, able to break into smaller pieces. |
| MEAT | Mince: like gravel. Slices: hard, possible to break. |
| MUSHROOMS | Brittle, with a distinct sound when you break a piece. |

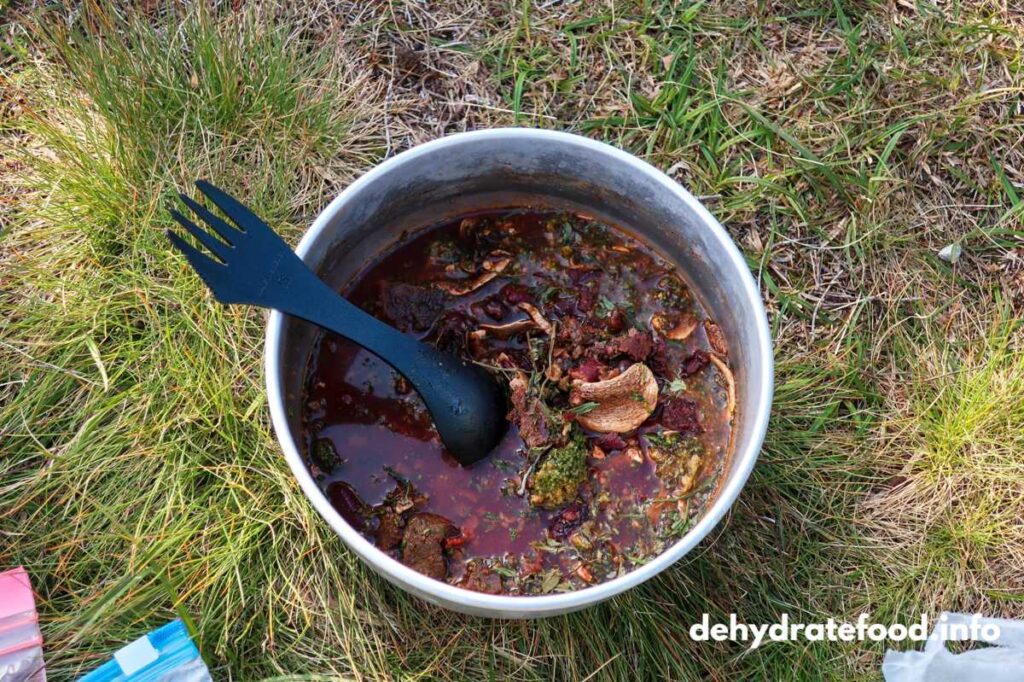
Dried beetroot with a onion and a bouillon cube will make a good soup!
TEMPERATURES
| MEAT | CHICKEN | FISH | 68°C (155°F) |
| BERRIES | FRUIT | VEGETABLES | BEANS | PUREE | 52°C (125°F) |
| MUSHROOMS | HERBS | ONIONS | FRUIT (APPLES) | Room temperature or 30–40°C (86–104°F) |

DRYING TIMES
Drying times vary with humidity, type of oven, the ingredient’s thickness and several other factors.
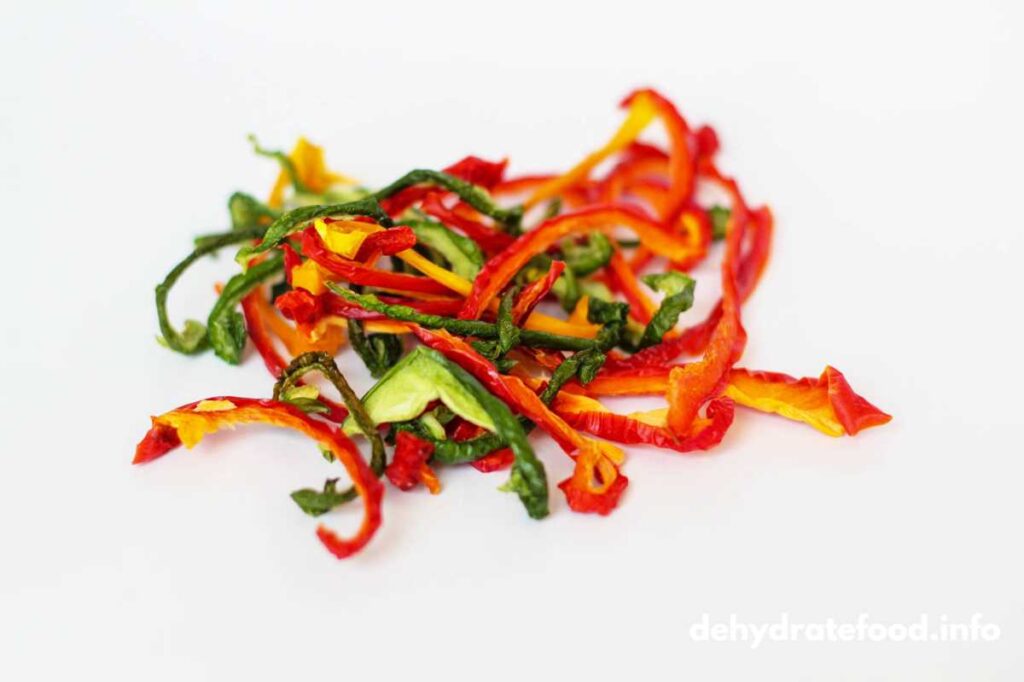
VEGETABLES
Read more: dehydrate vegetables
Most vegetables are dried at 52°C (125°F). It is best to blanch the vegetables if they are to be stored for a long time. Heated vegetables better keep their color and flavor. However, peppers, tomatoes and onions should usually not be pre-treated with heat.
Vegetables – 52°C (125°F)
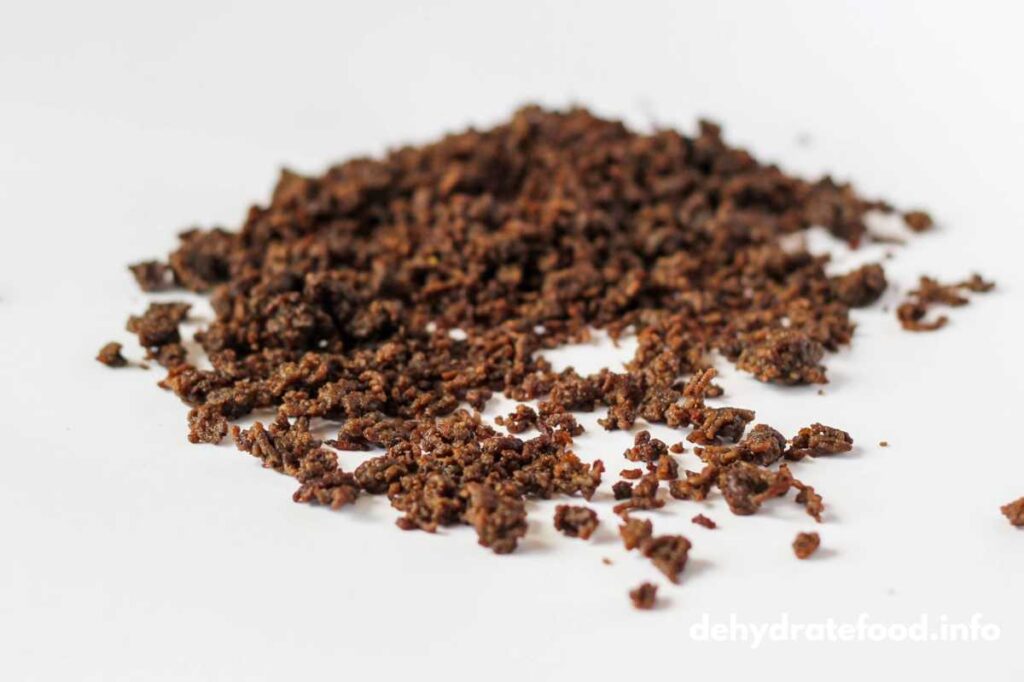
GROUND MEAT
You can dry both minced meat and vegetarian mince. Season and fry in a pan. It is clever to pulse the mince in a food processor before drying to get an even size of the food.
Ground meat – 68°C (155°F)
Vegetarian options – 52°C (125°F)
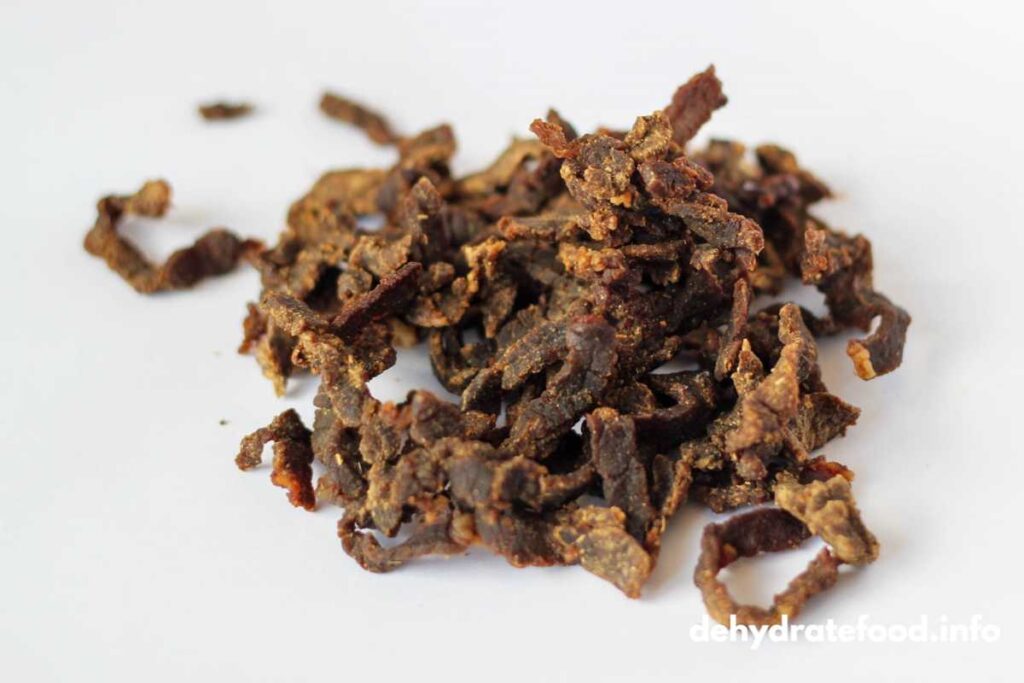
PIECES OF MEAT
It is easy to dehydrate pieces of meat or vegetarian options. Cut them 2-3 mm thin so they don’t take too long to dry and soak. If raw, fry before drying.
Meat – 68°C (155°F)
Vegetarian options – 52°C (125°F)
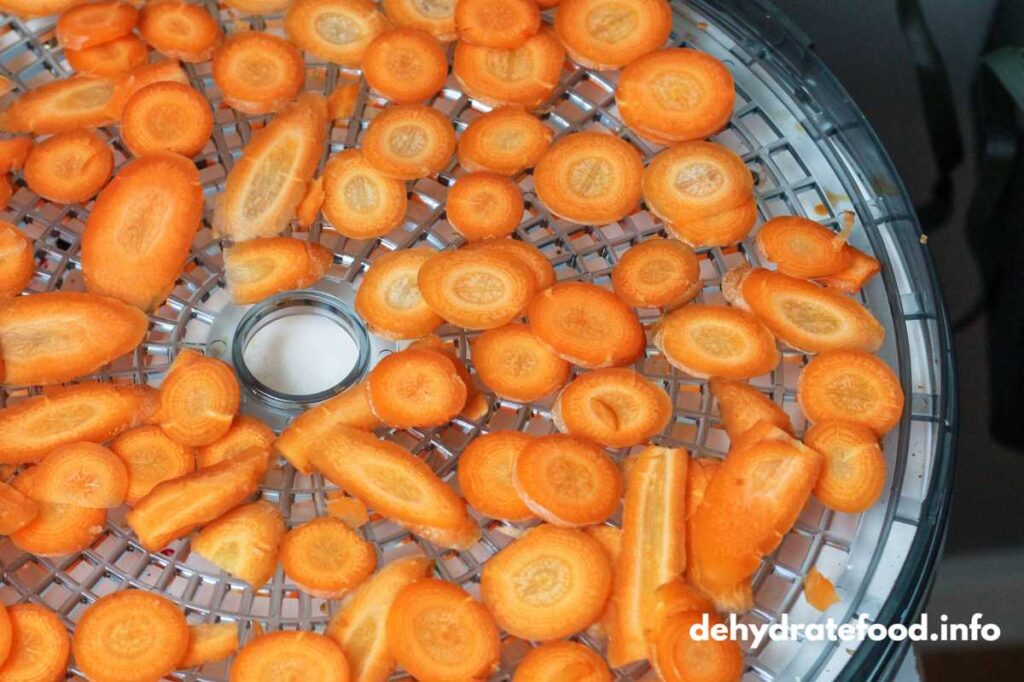
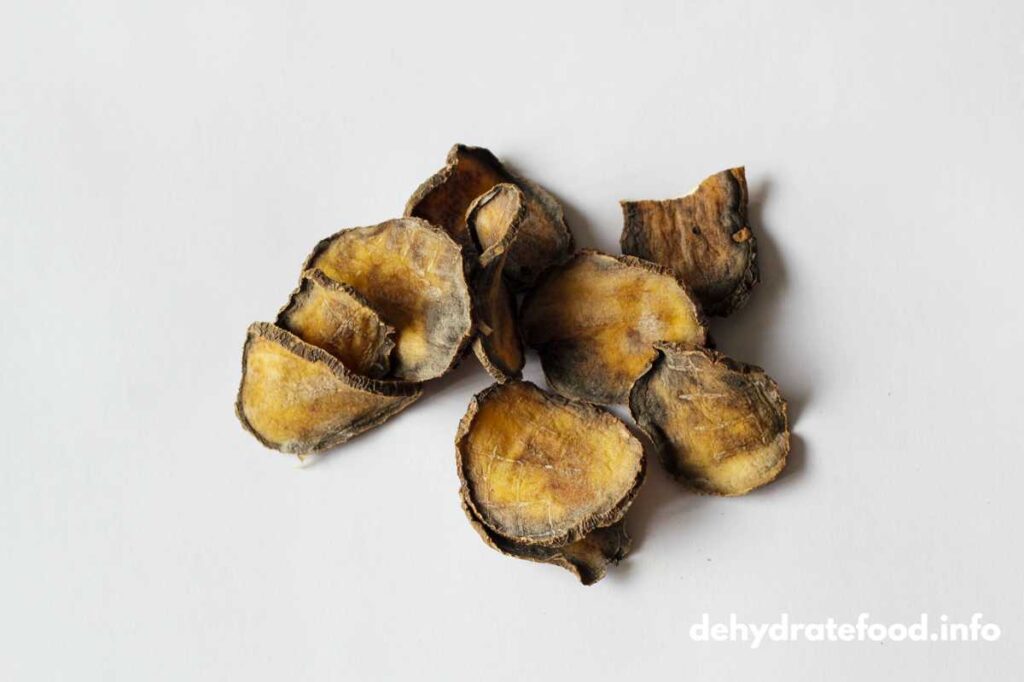
ROOT VEGETABLES
Read more: dehydrate root vegetables
Potatoes must be heated before drying. Other root vegetables often benefit from soaking as it reduces the time for drying and soaking. Try drying root vegetables cut in different shapes.
Root vegetables – 52°C (125°F)
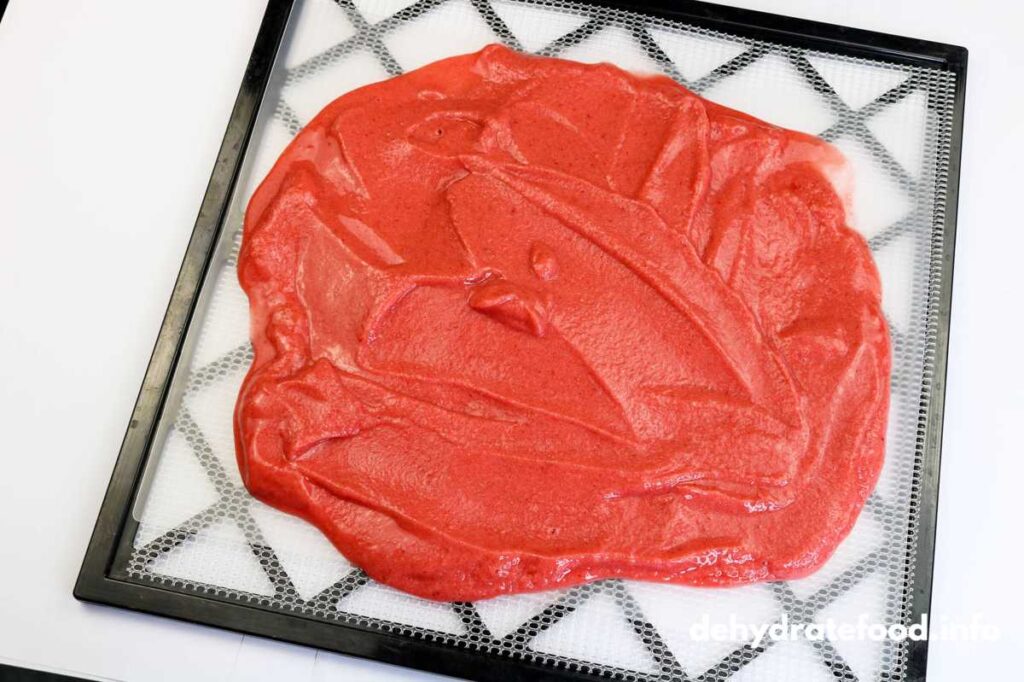
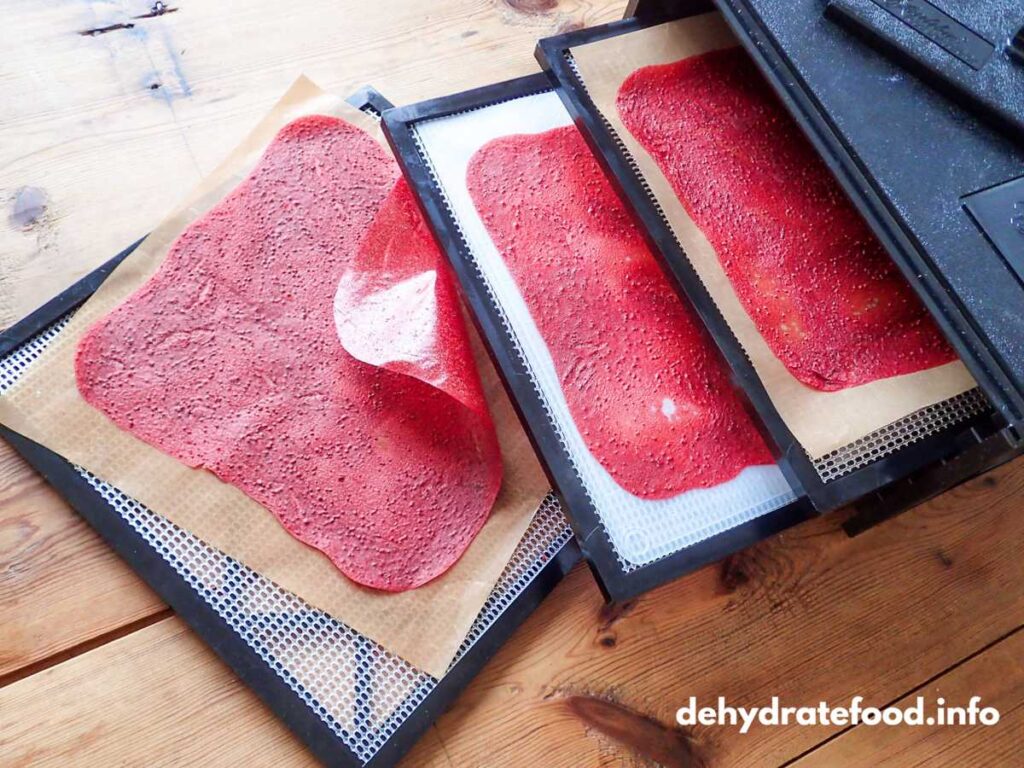
PUREÉ
If you mix a pureé of fruit and berries, you can make a “fruit leather”. Use reusable baking paper or special drying sheets for your dehydrator.
Fruit pureé – 52°C (125°F)
COMMON MISTAKES
| TOO THICK PIECES | The food then dries too slowly and can go bad. |
| DIFFERENT THICKNESS | If the pieces have random thicknesses, they will have different drying times, which makes it hard to determine when the food is dry. |
| TEMPERATURE TOO HIGH | The nutritional value and taste decrease with high temperatures. The surface can become dry but not on the inside, causing food to mold. |
| POOR AIR CIRCULATION | If you air dry in a space with poor air circulation, the process will take too long, and the food can mold. |
| TOO MUCH AT A TIME | In the beginning, it is challenging to handle a lot of food at a time. Instead, dry smaller batches at a time. |
| TOO FATTY FOODS | Food with a higher fat content than 10% can be challenging to dehydrate. Fatty food goes rancid after a period of storage. |
STORAGE OF DRIED FOOD – AT HOME
Different foods need to be stored in various ways for best preservation. In general, dried food should be kept cool, dark and dry. Food with fat should be stored in the fridge or freezer, preferably vacuum-packed.
MUSHROOMS
Store dry, cool and dark, preferably in an air-tight glass jar.
FRUIT & BERRIES
Store dry, cool and dark. Preferably in an air-tight glass jar.
ROOT VEGETABLES
Store dry, cool and dark.
HERBS
Store the herbs in a dry, cool, dark place, preferably in an air-tight glass jar. It may be better to have several small jars than one large one, as they can lose flavor if the jar is opened too often.
FISH
Store the dried fish in the freezer, vacuum-pack fatty fish.
MEAT
Store the dried meat in a freezer bag or, even better, vacuum-packed, as meat contains fat.
CHICKEN
Store the chicken in a plastic bag in the freezer. Less prone to go rancid.

STORAGE OF DRIED FOOD – ON A HIKE
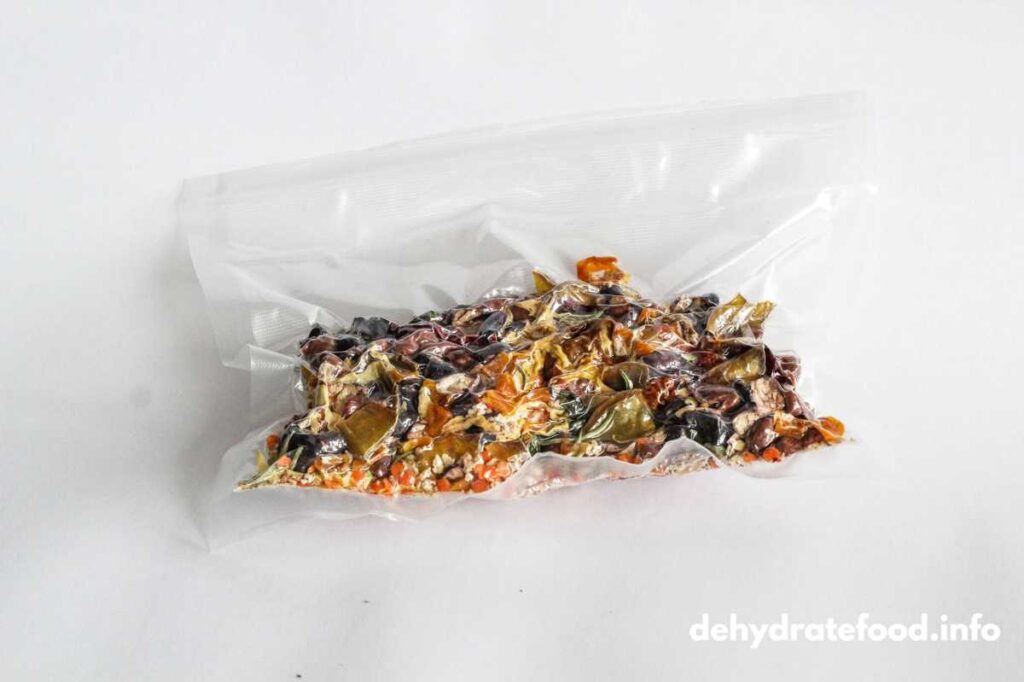
There are several ways to bring dried food on a hike. If you are going to be out for several weeks, it is, of course, more important that it is well-packed than if you are going to be out for the day.
The most important thing is that the food is packed watertight so it doesn’t go bad (mold).
Vacuum packing is the best and safest way to bring on the trail – but make sure sharp food doesn’t puncture the bag!
Three ways to pack dried food on a hike:
- Plastic bag
- Vacuum bag
- Plastic can
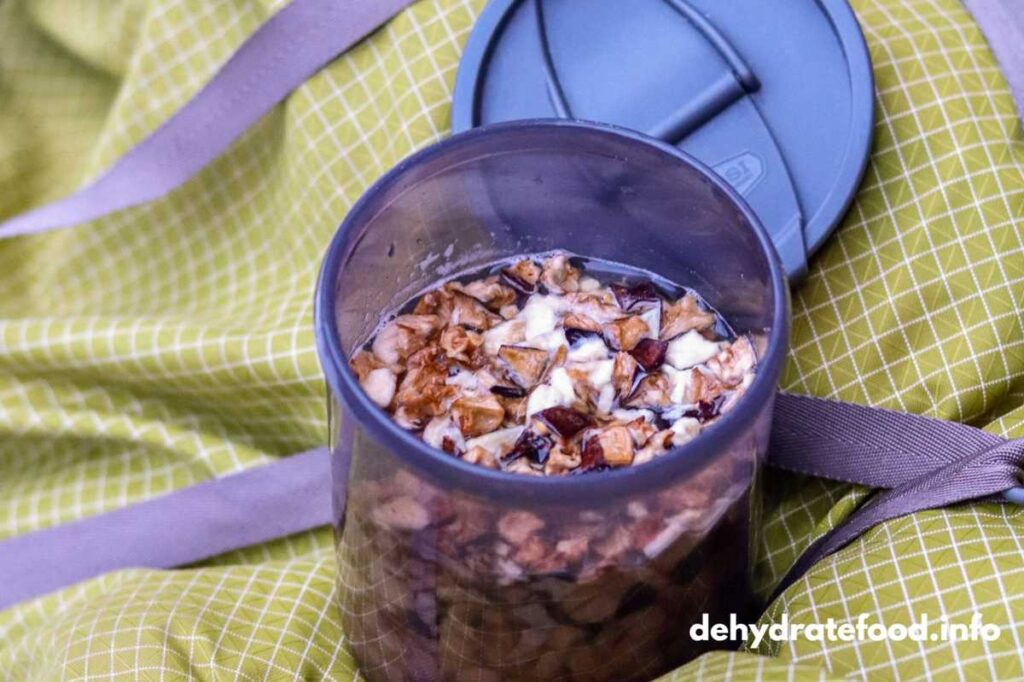
SOAKING & REHYDRATION
Dried apples and other fruit do not need to be soaked. But food that is to be cooked should be rehydrated to reduce cooking time.
Here are some quick tips on soaking:
Don’t soak with fat – then the soaking becomes longer (e.g., oil in trail food)
Don’t soak in too much water; use less and add more if needed – otherwise, you risk losing valuable flavors in the excess soaking water (unless you’re making a stew, then you can utilize it all).
Try to keep the soaking time as short as possible – this reduces the risk of bacteria formation. Soak preferably in warm water – it shortens the soaking time.
COMPOSE DISHES
A dish typically consists of carbohydrates, protein and fat. And spices, of course! There are a few different ways to cook and compose; you can read about them below.
Fat is added after soaking. About 30 grams of protein (dried meat, fish or other) is enough per portion. Test yourself to determine the ideal quantity of dried carbohydrates to satisfy your hunger.
| ONE POT COOKING | Here, you mix everything in a bag and soak. It can be potatoes, vegetables and meat with various spices. Everything is then cooked in a pot. If the food is sliced thin, it can be eaten directly after being soaked in hot water, like freeze-dried food. |
| STEW | Similar to “one-pot” but more focused on protein and less on carbohydrates. You combine different dry ingredients into a tasty stew, which is rehydrated before you cook it. Use more flavor as it will be mixed with rice, pasta or other starchy food. |
| DEHYDRATE A STEW | In this case, dry a cooked stew on a baking sheet in the oven or a food dehydrator until completely dry, crush and pack in a bag. |
| SALAD | You can easily make a salad of, for example, dried cabbage, tomato, paprika or carrots. You can also make a potato salad with potatoes, onions and dried capers. |
TWO RECIPES
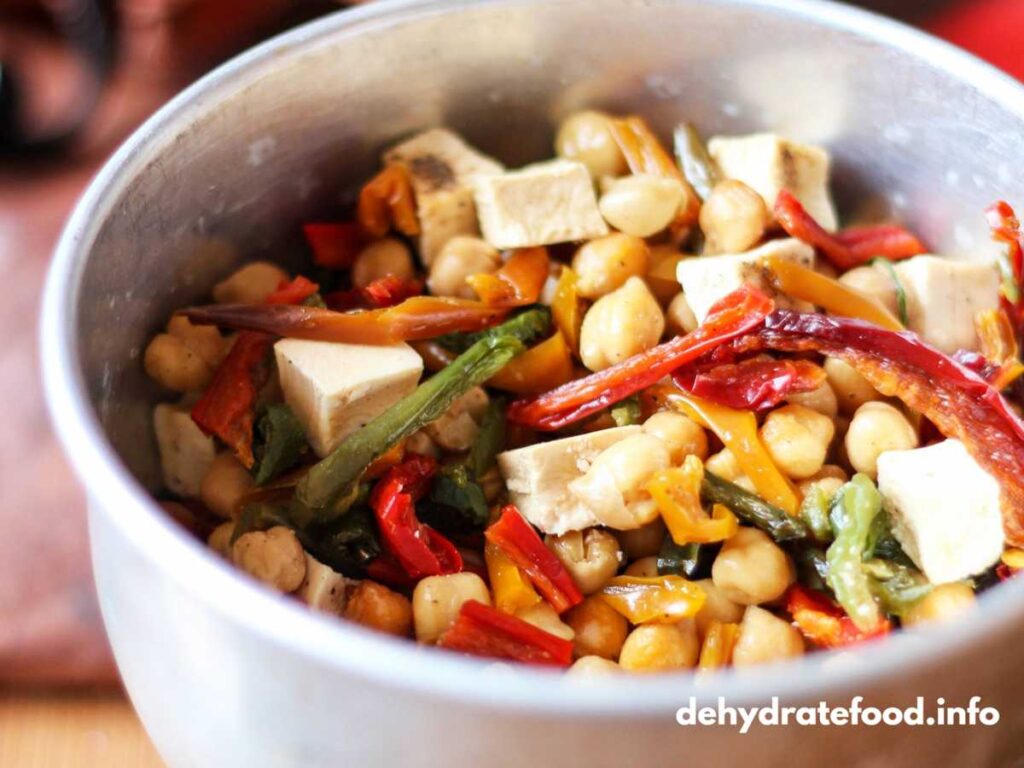
CASSEROLE WITH CHICKPEAS AND CHILLI
(2 servings)
A stew that is as tasty as it is colorful. If you soak the stew in cold water, it will have more texture and chewiness than if you soak it in hot water. Add oil after soaking; otherwise, it will take longer. Which oil you use dramatically determines the taste; a flavourful olive oil has a different character than a neutral cooking oil.
200 ml dried chickpeas
100 ml dried feta cheese/salad cheese
100 ml dried peppers
Black pepper
1 chopped red chilli
Salt
+ 400 ml cold water
+ 4 tbsp oil
RISOTTO ON DRIED MUSHROOMS
(2 servings)
100 ml dried mushrooms
2 shallots
1 clove of garlic500 ml mushroom bouillon (water and stock cube)
2 tbsp olive oil
200 ml Arborio rice
100 ml white wine
Salt, black pepper
- Soak the dried mushrooms.
- Fry the chopped onion in olive oil, add the rice and fry for a while. Pour in the wine. Add half of the bouillon and cook on low heat. After ten minutes, add the mushrooms. Add a little bouillon every second minute and boil until the rice has a slight chewing resistance.
- Serve with parmesan cheese and freshly ground black pepper.
Food Dehydrating: The Illustrated Handbook: Including 300 color images

Do you want to learn how to dehydrate food efficiently and safely?
Do you find it hard to find the right food dehydrator?
Do you want to see the process and the result in hundreds of color images?
– Then this book is for you!
The author has 20 years of experience in food dehydration, with seven written books in the field of food preserving and outdoor food. In this fully illustrated book, he guides the reader through the basic knowledge of food dehydrating. The more experienced reader will find ways to make beef jerky, fruit leather, energy bars and herb salt. A whole chapter is devoted to different types of dehydrators.
The book has sold more than 30,000 copies in the Nordic countries (Sweden, Norway, Denmark and Finland)
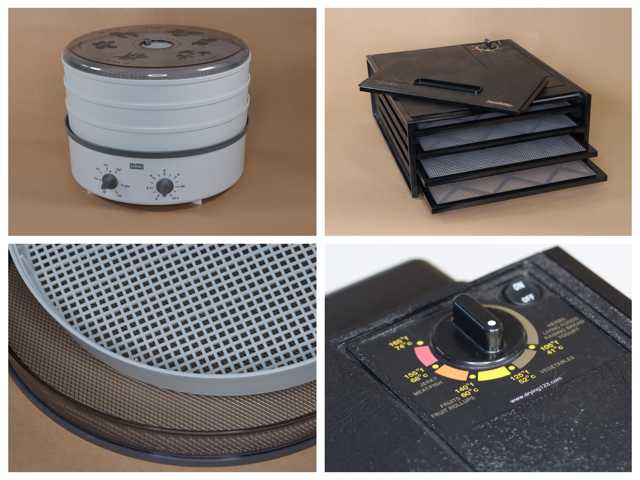
HOW TO CHOOSE A FOOD DEHYDRATOR
A food dehydrator is also called “dehydrator oven”, “mushroom dryer”, and, in some cases, a “fruit dryer”. The principle of all food dryers is the same – hot air passes over the food and dries it. However, there are two different types of food dehydrators.
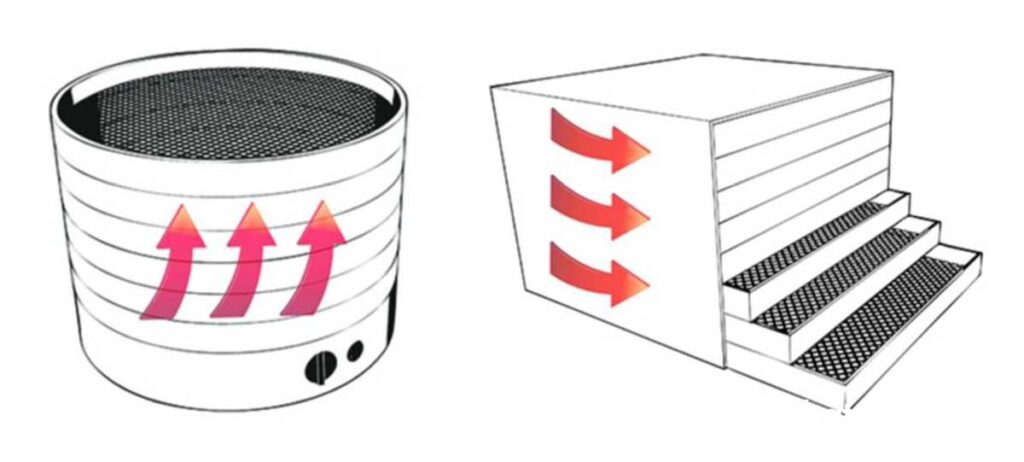
Consider the necessary capacity for your dehydrator and whether you intend to dry wet food such as fruit leather and more advanced trail food. For wet food, you need an oven with horizontal airflow.
There are dehydrators with horizontal and vertical airflow. Both types work great, but choose a dehydrator with horizontal flow to dry wet foods such as purees or stews.
If you want to dry a lot of food at the same time, for example, if you have a garden with fruit and vegetables or if you dry for many people – then a larger food dryer is a good idea. A smaller dehydrator is fine if you dry small amounts at a time. If you have little space at home, it can also be suitable with a smaller model.
A thermostat is a must. Then, you can regulate the temperature precisely according to the food you are drying. Otherwise, you risk drying the food too hard (hot) and spoil it.
The timer is very convenient and gives you a better idea of how long it takes to dry different foods. It is also a safety issue if you leave the oven unattended.
Digital or mechanical knobs/buttons for adjusting temperature and time are a matter of taste.
Of course, the price is relevant when choosing a food dehydrator. But with a higher price, you get, among other things, quality, BPA-free plastic, more even drying and built-in safety such as overheating protection. Also, if the dehydrator breaks down, the warranty is more extensive on more expensive models, and there are spare parts available.
Good luck finding the dehydrator for your needs!
Images below: eggs, chicken, energy cookies, cream cheese, oil and spices, pickles, kale, lemon and salmon.